Quantcast
Channel: Hacker's ramblings
Viewing all 516 articles
Browse latest View live

Blog upgrade to S9y 2.00 and HTTPS

$
0
0

Last weekend I went for Serendipity software version 2. This caused lot of downtime as the upgrade didn't go smoothly. I also made the entire server almost choke to a crash as my .htaccess / mod_rewrite -trickery caused looping. My Apache tried to loop itself into an exhaustion.

After I got everything back into shape, I got new toys. Especially the back office -side is vastly improved. On the public-side it seems pretty much the same.

While working on the blog I chose to go HTTPS. That seems to be the industry trend, see HTTPS as a ranking signal. While at it I verified my SHA-256 -signed certificate with Qualsys SSL Labs analysis tool. A certificate signed with less bits is considered as "insecure" nowadays as Google Chrome chooses to dislike your SHA-1 or MD5 -signed certs.


Exporting a website certificate

$
0
0

This one was a tough one for me. Not technically, but mentally. I wrote about Java 1.7 update 51 breaking Cisco ASDM and how to fix it. Two separate users had the same problem, they didn't know how to get their hands on the Cisco certificate which is required.

My dilemma here is:
So, you're in charge of heavy machinery called a firewall, but you don't know how to get a certificate out of a website, huh!
This s a basic task for any security-minded admin, it's obvious that the skills required and skills available are pretty far from each other. Should I give instructions for this basic task, only to postpone the inevitable?

I guess I should.

Method 1: GnuTLS (the best option)

If you happen to have GnuTLS installed, it has an excellent command-line utility. This is mostly in Linux, but I have one running on Windows via Cygwin. Not all Linux distros have this one installed by default. It is easily available on all distros, though.

Example run (information has been omitted for brevity):

# gnutls-cli --print-cert blog.hqcodeshop.fi
Resolving 'blog.hqcodeshop.fi'...
Connecting to '81.22.252.148:443'...
- Certificate type: X.509
- Got a certificate list of 2 certificates.
- Certificate[0] info:
 - subject ..., SHA-1 fingerprint `c87f57f182cd10be0d16b52c5a41c4a915593e6b'
        Public Key Id:
                c6a1e7cd6139f2ec8872e0a198b2a15a26fe1461
        Public key's random art:
                +--[ RSA 2048]----+
                |                 |
                |                 |
                |   E    .        |
                |  . .  o . .     |
                |   .  . S =      |
                |    +  + B o     |
                |ooo+ o  . =      |
                |*=o o .. o       |
                |*o.. o. . .      |
                +-----------------+


-----BEGIN CERTIFICATE-----
MIIEqzCCA5OgAwIBAgIDAih/MA0GCSqGSIb3DQEBCwUAMEcxCzAJBgNVBAYTAlVT
...
nklApvqYviZIwv20nMLwHjtf71ycGZumzNNWQrECBgNWYhFuNyaNe3nzO5fym6o=
-----END CERTIFICATE-----

- Certificate[1] info:
 - subject ..., SHA-1 fingerprint `0e34141846e7423d37f20dc0ab06c9bbd843dc24'

-----BEGIN CERTIFICATE-----
MIIEJTCCAw2gAwIBAgIDAjp3MA0GCSqGSIb3DQEBCwUAMEIxCzAJBgNVBAYTAlVT
...
ZI3NjGFVkP46yl0lD/gdo0p0Vk8aVUBwdSWmMy66S6VdU5oNMOGNX2Esr8zvsJmh
gP8L8mJMcCaY
-----END CERTIFICATE-----

- Status: The certificate is trusted.
- Description: (TLS1.2-PKIX)-(ECDHE-RSA-SECP256R1)-(AES-128-CBC)-(SHA256)
- Ephemeral EC Diffie-Hellman parameters
 - Using curve: SECP256R1
 - Curve size: 256 bits
- Version: TLS1.2
- Key Exchange: ECDHE-RSA
- Server Signature: RSA-SHA1
- Cipher: AES-128-CBC
- MAC: SHA256
- Compression: NULL
- Handshake was completed

- Simple Client Mode:

Just hit ctrl-d or ctrl-c when the Simple Client Mode -prompt appears. You could actually talk HTTP to the server with that, but for getting the certificate it is not needed. The cert is already out there, just copy it and save it in a file. The 2nd cert is only intermediate CA certificate and it can be downloaded from web.

If you want to see the omitted information, just run the command. A public certificate is as public as anything in the net, there is no point in trying to hide it.

Method 2: OpenSSL (the popular option)

This method will work on any Linux or Mac OS X. There are couple of OpenSSL implementations for Windows, so most boxes should be able to run this one.

Why this isn't the best option is, because OpenSSL client doesn't do proper SNI. In the example below, it returns the wrong certificate. Not the one requested. If your site isn't sharing an IP-address, this will work for you.

Example:

# openssl s_client -connect blog.hqcodeshop.fi:443
CONNECTED(00000003)
depth=2 C = US, O = GeoTrust Inc., CN = GeoTrust Global CA
verify return:1
depth=1 C = US, O = GeoTrust Inc., CN = RapidSSL SHA256 CA - G3
verify return:1
depth=0 OU = GT61328546, ..., CN = *.hqsting.net
verify return:1
---
Certificate chain
 0 s:/OU=GT61328546/.../CN=*.hqsting.net
   i:/C=US/O=GeoTrust Inc./CN=RapidSSL SHA256 CA - G3
 1 s:/C=US/O=GeoTrust, Inc./CN=RapidSSL CA
   i:/C=US/O=GeoTrust Inc./CN=GeoTrust Global CA
---
Server certificate
-----BEGIN CERTIFICATE-----
MIIErjCCA5agAwIBAgIDAit7MA0GCSqGSIb3DQEBCwUAMEcxCzAJBgNVBAYTAlVT
...
TP3W1usGKSJ+fipYhc9ZTUFVs+g3FZ+m3Sltyfb/motM06EP6eq5heDxxPquEhaq
OsY=
-----END CERTIFICATE-----
subject=/OU=GT61328546/.../CN=*.hqsting.net
issuer=/C=US/O=GeoTrust Inc./CN=RapidSSL SHA256 CA - G3
---
No client certificate CA names sent
Server Temp Key: ECDH, prime256v1, 256 bits
---
SSL handshake has read 2921 bytes and written 415 bytes
---
New, TLSv1/SSLv3, Cipher is ECDHE-RSA-AES128-SHA256
Server public key is 2048 bit
Secure Renegotiation IS supported
Compression: NONE
Expansion: NONE
SSL-Session:
    Protocol  : TLSv1.2
    Cipher    : ECDHE-RSA-AES128-SHA256
    Session-ID-ctx:
    Key-Arg   : None
    Krb5 Principal: None
    PSK identity: None
    PSK identity hint: None
    TLS session ticket lifetime hint: 300 (seconds)
...
    Start Time: 1423326309
    Timeout   : 300 (sec)
    Verify return code: 0 (ok)
---
DONE

Just hit ctrl-d or ctrl-c at the prompt. Again, you're at the HTTP-mode now and could talk to the web-server. The certificate is waiting on the screen to be copied and saved to a file.

Method 3: Firefox (the easy option)

Exporting a certificate of a website is implemented in Firefox browser.

Click the lock-symbol:
A small dialog will open. Select More information:

A big dialog with lot of information about the site will open up. One of the options is to View Certificate. Select it:

Step 4:
Select the bottom sertificate and export it. It will open a save as -dialog:

That's it! Now you have the certificate saved.

Goodbye Maxthon

$
0
0

I have a policy of running a lot of different browsers on my computers. The idea is to gain experience of what works and what won't. When doing web development, any run-of-the-mill developer gets a tunnel vision and starts spewing out the classic "it works for me!" -style answers, when there are issues with a site.

So, I'm fighting hard to defeat that by using a lot of different browsers. One of my tools has been Maxthon browser. It isn't anymore. Goodbye Maxthon!

I was reading an article about "Lenovo PCs ship with man-in-the-middle adware that breaks HTTPS connections" and went to https://filippo.io/Badfish/ to check my browser. Amazingly it showed YES:

Whaat!

If I download the https://badfish.filippo.io/yes.png directly, then there is a proper notification about the problem:

... but seeing the picture embedded nicely in a website means, that the browser won't bother checking while rendering a page. Anybody can display anything on a web page and I won't get any information about the dropped security. Not good. :-(

There is no other way, than to uninstall. I absolutely won't recommend using anything that insecure!

iPhone (cell) Field Test mode

$
0
0

A reader of this blog contacted me and wanted me to take a look at his Huawei E5186. During the meeting he showed the Field Test mode of his iPhone. I haven't done any iPhone hacks, and had never heard of such thing. In this mode you can see details of the cellular connection. It is completely limited to that, there is no "root"-mode, nor details about Wi-Fi connection, nor details of the phone itself. But if any of the SIM, GSM, UMTS or LTE details are of interest, this one is for you.

Every iPhone has this. Really! There are details of this Field Test mode in The Net from year 2009 (iPhone 3GS), maybe earlier if you'd really want to look close. My iPhone 6 has this, so I'm pretty sure your (whatever model) has it too.

How to get there? Easy. Dial *3001 # 12345#*. Like this:

As a result you will see either the 2G/3G (GSM/UMTS) or 4G (LTE) Field Test menu:

As you can see, the 2G/3G menu has more stuff in it. It is because this is the really old stuff back from the 90s. LTE menu is light, as it is the 2010s spec. Please remember, that it is a snapshot of the situation when menu was opened.

Also notice how there is no more bars on top of the screen, there is a number in dBm. The number will indicate RSSI (in 2G) or RSCP (in 3G) or RSRP (in 4G). See article Some GSM, UMTS and LTE Measurement Units for clarification of the units.

RSSI translation:

  • -40 dBm - theorethical max., you won't get this even if you'd be right next to the cell tower
  • -50 to -75 dBm - High
  • -76 to -90 dBm - Medium
  • -91 to -100 dBm - Low
  • -101 to -120 dBm - Poor

RSRP translation:

  • theorethical max. ? dBm
  • -75 and -88 dBm - Very High
  • -89 and -96 dBm - High
  • -97 and -105 dBm - Medium
  • -106 and -112 dBm - Low
  • -113 and -125 dBm - Poor

As I didn't find much information about the actual contents of these menus, I'll try to gather here a comprehensive list. Not all of the items have a value in my phone, if there is a value recorded, but I don't know what it is for, there is a ?.

Menu / SubmenuDescription
SIM Info 
(sub level 1)
EF-FPLMN 
 EF-ICCID 
 EF-OPLMNAcT 
 EF-HPPLMN SEARCH PERIOD 
 EF-MSISDN 
 EF-3GPP MAIL BOX DIALING NUMBER 
 EF-ACCESS CONTROL CLASS 
 EF-OPERATOR PLMN LIST 
 EF-ACTING HPLMN 
 EF-ADMINISTRATIVE DATA 
 EF-RAT MODE 
 EF-LOCI 
 EF-GPRS/PS-LOCI 
PDP Context Info(List) Packet Data Protocol (PDP) Context (in GPRS), see http://developer.nokia.com/community/wiki/PDP for details of PDP
 APNAccess Point Name: Connection setting
 IPv4IPv4 address of the access point to connect to
GSM Cell Environment[UMTS only] 2G/2.5G information
 GSM RR Info 
  DTX Used?
  RR State 
  Rx Quality Sub 
  RR Mode 
  RR Sub State 
  Serving Rx Level 
  DRX used 
  RR Status 
  Rx Quality Full 
 GSM Cell Info 
  GSM Serving Cell 
  
(sub level 3)
C1 Value 
   RSSI 
   ARFCNAbsolute radio-frequency channel number
   Cell IDhttp://en.wikipedia.org/wiki/Cell_ID
Gather MCC, MNC, LAC and go http://opencellid.org/ to see where you are at
   Mobile Allocation 
   
(sub level 4)
ARFCNs(List)
    HSN 
   C2 Value 
   BSIC? bits
   MA Dedicated ARFCN 
  Neighboring Cells(List)
 GPRS Information 
  Priority Access Threshold?
  SI13 Location?
  Ext Measurement Order 
  Access Burst Type?
  DRX Timer Max?
  Network Operating Mode?
  PBCCH Present 
  Count LR 
  Packet PSI Status 
  PFC Supported?
  Cell Reselect Hysteresis 
  Count HR 
  Packet SI Status 
  Network Control Order?
  T3192 Timerhttp://www.rfwireless-world.com/Terminology/GSM-timers.html [milliseconds]
UMTS Cell Environment[UMTS only] 3G information
 Neightbor Cells 
  Active Set(List)
  Detected Set(List)
  Monitored Set(List)
  UMTS Set(List) The only one I have anything listed
   Scrambling CodeYour "identifier" in the cell. See UMTS Quick Reference - Scrambling Code for more info
   RSCPReceived signal code power: The number on top left of your screen. See UARFCN below.
   Energy Per ChipEcNo: RSCP divided by RSSI. See Some GSM, UMTS and LTE Measurement Units for details about RCSP and EcNo.
   UARFCNSee UMTS RR Info below. In this set one of the cells has same scrambling code as UMTS RR Info has. That cell has the exact same RSCP what is displayed as your received signal strenght.
  Virtual Active Set(List)
  GSM Set(List)
 HSDPA Info 
  Version 
  Primary HARQ Process 
  Sub Frames 
  Secondary HARQ Process 
  Carrier Info 
 UMTS RR InfoInformation of the Radio Relay (cell tower) who is serving you
  UARFCNUTRA Absolute Radio Frequency Channel Number: The channel number you're currently at. Decimal number, see http://niviuk.free.fr/umts_band.php for listings of bands.
  BLERBlock Error Rate (my phone displays nothing here)
  Cell IDhttp://en.wikipedia.org/wiki/Cell_ID
Gather MCC, MNC, LAC and go http://opencellid.org/ to see where you are at
  RRC StateSee UMTS RCC States (my phone displays nothing here)
  Downlink Frequency(my phone displays nothing here)
  Scrambling CodeYour "identifier" in the cell. See UMTS Quick Reference - Scrambling Code for more info
  Uplink Frequency(my phone displays nothing here)
  Ciphering(my phone displays nothing here)
  Transmit Power(my phone displays nothing here)
MM Info[UMTS only]
 Serving PLMNPublic land mobile network information
  Location Area CodeLAC (decimal): http://en.wikipedia.org/wiki/Location_area_identity
  Routing Area Code?
  PLMN Sel Mod 
  Mobile Network CodeMNC (decimal): http://en.wikipedia.org/wiki/Mobile_country_code
  Mobile Country CodeMCC (decimal): http://en.wikipedia.org/wiki/Mobile_country_code
  Service Type?
 Process PS 
  MM Sub State 
  MM State 
  MM Service State 
  Attach Reject Cause 
 Process CS 
  MM Sub State 
  MM State 
  MM Service State 
  LU Reject Cause 
 Equivalent PLMN List 
 Process CO 
  MM State 
  MM Service State 
Neighbor Measurements[LTE only]
 E-ARFCN 
 Version 
 Neighbor Cells List(List)
 
(sub level 2)
Measured RSSI 
  Ant 0 Sample Offset 
  Physical Cell ID 
  Ant 0 Frame Offset 
  Average RSRP 
  Average RSRQ 
  Ant 1 Frame Offset 
  Srxlev 
  Ant 1 Sample Offset 
  Measured RSRP 
  Frequenct OffsetTypo? Frequency Offset
  Measured RSRQ 
 Qrxlevmin 
Connected mode LTE Intra-frequency Measurement[LTE only]
 Detected Cells(List)
 Measured Neighbor Cells(List)
 Serving Filtered RSRQ 
 Serving Physical Cell ID 
 Subframe Number 
 Serving Filtered RSRP 
 E-ARFCN 
Serving Cell Info[LTE only]
 Download Bandwidth 
 Freq Band Indicator 
 Download Frequency 
 Num Tx Antennas 
 UARFCN 
 Tracking Area Code 
 Cell Identity 
 Physical Cell ID 
 Upload Frequency 
 Upload Bandwidth 
Reselection Candidates[LTE only]
 Version 
 Serving Cell ID 
 Serving EARFCN 
 Reselection Candidates List(List)
Serving Cell Measurements[LTE only]
 Measured RSSI 
 Qrxlevmin 
 P_Max 
 Max UE Tx Power 
 Version 
 S Non Intra Search 
 Physical Cell ID 
 Average RSRP 
 Measurement Rules 
 Average RSRQ 
 Serving Layer Priority 
 Srxlev 
 Measured RSRP 
 Num of Consecutive DRX Cycles of S < 0 
 Measurement Rules Updated 
 Measured RSRQ 
 E-ARFCN 
 S Intra Search 

Please help me complete this (at least all the good stuff). If you find something incorrect or missing, please drop me a comment.

First B593 s-22 exploit: Setup FTP to get /var/sshusers.cfg

$
0
0

I have a new version of B593_exploit.pl published. See this article about previous info.

This version has s-22 FTP hack added to it. u-12 has the classic FTP USB-share flaw where it is possible to create a FTP share of the /. Unfortunately in this box Huawei guys made the web GUI a bit smarter, you cannot do such a nice share anymore. The fortunate part is, that the guys don't check for that at the save. :-) If you manage to lure the ../.. past the GUI, you can do it. That's what the exploit is about.

Example run:

./B593_exploit.pl 192.168.1.1 admin --ftp-setup \  ftpuser ftppassword

That command will share the first USB-device found at the filesystem root of the box. You have to have a physical USB-storage attached. It doesn't have to have anything on it and it won't be affected during the process. But setting a path will fail, if there is no USB-storage.

I had problems with the FTP-client, it kept complaining about FTP passive mode. I switched the client into NcFTP and that solved my problem.

When in the box the SSH passwords are at the classic /var/sshusers.cfg. If configuration is of interest to you, it can be found from /app/curcfg.xml. When the admin user's password is known, it is only a trivial task to SSH into the box and gain a shell access.

While looking around the box, I got carried away with the lteat-command. I managed to brick the box. :-( But that's an another story.)

ZTE MF910 Wireless Router reviewed

$
0
0

I had a chance to setup a modern 4G/3G/2G router. Of course I took pics and share the details here! :-)

This is what a ZTE MF910 looks like:

Pretty much the first thing that comes to my mind is: "It's a cell phone!" Yes, indeed. It is. It is an Android phone. My guess is, it is 99% of a cell phone when compared to an Android in your pocket. It is small, it has an USB-charger, runs hours from a battery. It is shiny (pretty difficult to get decent pictures of it). It has a display (no touching or anything expensive). And it costs 99,- €. There is very little differentiating it, except that it doesn't have a speaker and a microphone. I didn't pop the hood of it (that thing isn't mine, I was just helping to set it up), but I'm thinking it has all the chips and electronics a phone would have.

Screen will indicate connection type (2G/3G/4G), bars, Internet status (ok, both arrows up and down), Wi-Fi enabled, how many clients are connected to the Wi-Fi, battery charge level, operator name, cumulative time connected and the cumulative transmitted bytes.

On the back there are out-of-the-box defaults and mandatory IMEI-information. The TAC-code for this one is 86415402 and I couldn't find it from any TAC databases. Must be quite a new one. What I didn't find is how to replace the battery. I guess you cannot, it is like a cell phone. It doesn't feel hot or anything when running, looks like the electronics design is also modern. It puts all the electrons where you'd expect them to go, not to dissipate heat.

Here is a clear difference to a phone:

There are two antenna connectors (TS9) on the sides. As all LTE equipment always has 2 antennas (your phone does, you just won't see them), there needs to be connectors for both of them. The intended purpose for this is to convert cellular connection into Wi-Fi. As sometimes the cell network connection is poor, adding a proper antenna (or two) can make a difference. Power button has one extra feature including the obvious one. If you press it shortly, it will display the default WLAN SSID and password on the screen. Funny thing: if you change them, the screen won't display the new ones. :-) On the as-expected, there is a mini-SIM -slot and mini-A USB for the charger.

The antenna connector is a quirky one:

I couldn't find anything to connect to it. Any typical small appliance (like Huawei USB-sticks) have CRC9-connector, or the bigger routers (like Huawei B593) have SMA-connectors. I guess the new TS9 is suiting better for some reason.

When the SIM-card in inserted, power button pressed and box is up and running, it connects automatically to internet. It distributes an IP-address to any client devices and enables the management web-console. It looks like this:

There is a decent selection of langauges for the GUI:

And the top right corner status indicator is good one:

It provides a lot of information without need to login. This is what it looks like once in:

There is no need to look for Wi-Fi settings. :-) They are right there after a login. In general I really love their approach, lot of useful features and really well thought web-GUI implemented. Also the existence of 5 GHz WLAN tells about a modern design. A while ago only 2,4 GHz existed in routers such as this.

The Internet connection details are:

APN I didn't touch, it just worked. Network mode (2G/3G/4G) may be necessary if reception has issues. The most important thing is, that this box has a built-in freq lock in it. No need of hacking or any quirks. This is by far the most commonly asked question nowadays, how do you lock B593 into a frequency. With this el-cheapo box, setting is right there! Nice. :-)

I also love the status screens:

Lot of relevant information right at your screen! This is exactly what everybody else should be doing. Unfortunately the network status screen is optimized heavily for LTE-connections and on UMTS it won't tell much.

As a conclusion I have to recommend this cheaply built piece of plastic for any router needs. It certainly is worth the money and has just the right features in it. The only thing that worries me is the constant charging: will it survive future years? I don't care if the thing wouldn't run from the battery, but will the charger alone be enough to run it?

SHA1 Certificates being used By Finnish financial organizations

$
0
0

I was browsing news feeds and read an article about Danske Bank not using SHA-256 certificate (article in Tivi, in Finnish only) in its online bank. "So what? Big deal, huh. Nobody else does either." was my instant thought. 15 seconds later ... but do they really? Let's investigate.

The reasoning about the article is, that Goole is Gradually sunsetting SHA-1. That is something they announced in September 2014, giving plenty of time for service admins to react. Google's Chrome will display HTTPS using less than SHA-256 signed certificate which is valid past 1st Jan 2017 like this:

Anbody, who takes your security seriously will be displayed like this:

The difference is with the green lock, or lack of it. Most users don't care about the lock anyway, so lot of fuss about nothing.

The bad

OrganizationURIExpiryCertificate signatureCertificate issuerIntemediate certificate issuer(s)
Danske Bankwww.danskebank.fi2017-06-20SHA-1GMO GlobalSign 
OP-Pohjolawww.op.fi2015-12-12SHA-1SymantecVeriSign
Nordea Pankkisolo1.nordea.fi2016-04-22SHA-1VeriSign 
Ålandsbankenonline.alandsbanken.fi2015-07-29SHA-1DigiCert 
POP Pankkiwww.poppankki.fi2017-03-28SHA-1VeriSign 
Luottokunta (Nets)dmp2.luottokunta.fi2016-03-03SHA-1VeriSign 
Paytrailaccount.paytrail.com2015-05-15SHA-1VeriSign 

The good

OrganizationURICertificate signatureCertificate issuerIntemediate certificate issuer(s)
S-Pankkiwww.s-pankki.fiSHA256Symantec
Class 3 EV SSL CA - G3
(SHA256)

VeriSign
Class 3 Public Primary Certification Authority - G5
(SHA-1)

Aktia Pankkiauth.aktia.fiSHA256Symantec
Class 3 EV SSL CA - G3
(SHA256)

VeriSign
Class 3 Public Primary Certification Authority - G5
(SHA-1)

Säästöpankkiwww4.saastopankki.fiSHA256Symantec
Class 3 EV SSL CA - G3
(SHA256)

VeriSign
Class 3 Public Primary Certification Authority - G5
(SHA-1)

Handelsbankenwww4.handelsbanken.fiSHA256Symantec
Class 3 EV SSL CA - G3
(SHA256)
VeriSign
Class 3 Public Primary Certification Authority - G5
(SHA-1)

The conclusion

Apparently somebody does. :-) As it happens, all the banks having SHA-256 certificates are from same source: Symantec/Verisign. However, most of the institutions haven't had the time to react. There is no point to finger point (pun intended) one of them.

The information was gathered with Gnu TLS command-line tool (gnutls-cli --print-cert).


Finnish Pre-paid Data Plans reviewed

$
0
0

As I test different network equipment regularily, I need SIM-cards and data plans for them. All of these are generally available and affordable, just go to nearest R-Kioski and get one.

Elisa (Saunalahti)

Elisa is the biggest telco with number of customers and market share. Their consumer products are under Saunalahti brand, including their pre-paid data plans.

Pre-paid data plans:

  • One day 4G (100 Mbit/s) 1.90 €
  • One week (21 Mbit/s) 6.60 €
  • One month (0,25 Mbit/s) 6.60 €
  • One month (4 Mbit/s) 14.90 €
  • One month (21 Mbit/s) 16.90 €
  • One month 4G (50 Mbit/s) 19.90 €
  • Six months (0,25 Mbit/s) 27.80 €

Incoming access:

None. All pre-paid and post-paid data plans are NATed. Post-paid 3G data plans have the possbility of changing into a non-NATed one, but that options is not available for 4G. This is total crap!

TeliaSonera

TeliaSonera is the 2nd biggest telco in Finland. As they operate also in Sweden, Norway and Estonia in general, it is the biggest corporation of these three.

Pre-paid data plans:

  • One week 4G (50 Mbit/s) 12,90 €
  • One month 4G (50 Mbit/s) 23,90 €

Incoming access:

None. All pre-paid and post-paid data plans are NATed. Post-paid data plans have possibility of subscribing a service (for small fee), to allow public IP-address. Having a fixed IP instead a dynamically allocated one costs extra.

DNA

DNA is the smallest player (excluding virtual operators). When it comes to telcos, size does not matter. Their coverage is equal to bigger players.

Pre-paid data plans:

  • 1 GiB transfer, six months 4G (150 Mbit/s) 9,90 €
  • 10 GiB transfer, six months 4G (150 Mbit/s) 19,90 €

Incoming access:

All data plans are allocated a dynamically changing public IP-address.

List of open TCP-ports (IP-protocol 6) found with Nmap:

  • 500/tcp
  • 1024/tcp
  • 1723/tcp
  • 2222/tcp
  • 4002/tcp
  • 5001/tcp
  • 5800/tcp
  • 5900/tcp
  • 6001/tcp
  • 7001/tcp
  • 8001/tcp
  • 8081/tcp
  • 8082/tcp
  • 8083/tcp
  • 8088/tcp
  • 8090/tcp

I also tested other incoming IP protocols and they seem to pass without limitations. Running VPN or IPv6-tunnels is completely possible.

Conclusion

The obvious winner is DNA. It is affordable, no NAT, incoming access is possible, although limited. The only drawback is for people requiring lot of transfer, there is limit for amount of bytes. If you run out, just add another 6 month package, and you're good to go.

2nd place goes for TeliaSonera post-paid Opengate-connection. It is still affordable (17,- € / month, incl. incoming access 3G/4G), no transfer limits and allows full incoming traffic without filtered ports.

3rd place goes for Saunalahti one day pre-paid. It offers speed, no transfer limits, but I had trouble comprehending their system. As I already had a pre-paid SIM, all I had to do is to add credits to its account, but ... I somehow didn't manage to do it. I did do it before, but ...


Huawei E5186 (prototype) reviewed

$
0
0

As I mentioned earlier, a reader of this blog got a Huawei E5186 and I got to test drive it. The model is still in prototype and the semi-official rumour is, that it will be released Q2/2015. As usual, they are not sold directly by Huawei, but by telcos. The one I had was from Germany, T-mobile. The mobile side is pretty much same as in B593s-22, the exact model I had was in fact E5186s-22. Frequencies and modulations are: LTE FDD DD800/900/1800/2100/2600 and TDD 2600. It is very likely, that inside the box is a HiSilicon Android running on a ARM-chip.

It looks exactly like a B593. Here are the pics:

The first things I noticed, that the Tel1 and Tel2 RJ-11 connectors are missing. Also: no USB!! What! I found information from discussion boards, that this particular T-Mobile version is a "poor man's model". There does exist other E5186 models, which have USB and the Tel-connectors.

As a B593 has, there are dual antenna connectors and they are SMA:

For testing this router I didn't need external antennas, the RF-side is much more sensitive than in a B593. In a location where I normally have one bar (without external antenna), this one got three (out of five). Nice!

If you'd want to pop the hood, it opens like B593 does, from the bottom:

All Huawei-hardware has a thin paper on top of one screw. This is to indicate if that screw was removed to void any warranty. I didn't open it, it wasn't my own box.

The web-GUI is completely new:

Everything looked brand new, so had to port-scan the thing:

PORT   STATE SERVICE
53/tcp open  domain
80/tcp open  http
MAC Address: 38:F8:89:03:1C:36 (Unknown)

What a surprise! Nothing there. Nothing! No SSH, no FTP, no Samba, no HTTPS. A B593 has plenty of ports open, but this beast is closed as a clam.

A cursory check on the HTML and JavaScript prooved, that entire front was re-written. B593 front has issues on security and functionality, this thing is entirely jQuery / AJAX -based thing. All the requests transfer XML. I was expecting JSON, but hey, it works. I guess there is something on back-end, which runs better on XML.

As the stripped-down hardware suggests, the web-GUI has very little options:

No real surprises there. The only thing, that really caught my eye, was the 5GHz WLAN which B593 doesn't have. There must be some new electronics inside.

This is the device information screen:

As it happened, also Finnish magazine happened to review the E5186. I don't have a permission for reprint, but here is a small glimpse what they said:

As a conclusion, the mag loved the box. I don't know which version they had, but this one without USB I don't especially love. It's too pricey without the port. Under the hood, the AJAX-API has a ton of features not available via your web browser. I'll get back to that subject later.

Huawei E5186 AJAX API

$
0
0

As I wrote in my E5186 review, there is a very good API for accessing the box.

All responses start with a <?xml version="1.0" encoding="UTF-8"?>. API-calls have <response> as the root element, config-calls have <config> as the root element. Some of the API-calls can be set (POST) or get (GET). Config cannot be set (POST), only read (GET).

URI

GET /
POST

Login
only
DescriptionSample
/config/global/config.xmlGET Config

<homepage/>
<default_language>de-de</default_language>
<dialogdisapear>3000</dialogdisapear>
<tip_disapear>3000</tip_disapear>
<update_interval>3000</update_interval>
<ap_station_enabled>0</ap_station_enabled>
<title>Mobile Broadband</title>
<login>1</login>
<autoapn_enabled>0</autoapn_enabled>
<footer>1</footer>
<battery_enabled>0</battery_enabled>
<continue_button>1</continue_button>
<special_redirect>1</special_redirect>
<menu_number>5</menu_number>
<roam_warn_enabled>1</roam_warn_enabled>
<hotlinks>
<enable>1</enable>
<items>
<item/>
<item/>
<item/>
</items>
</hotlinks>
<appmanagements>
<enabled>0</enabled>
<mobileWifi>
<android>http:&#x2F;&#x2F;consumer.huawei.com

&#x2F;minisite&#x2F;mobilewifiapp
&#x2F;apk&#x2F;HuaweiMobileWiFi.apk
</android>
<ios>https:&#x2F;&#x2F;itunes.apple.com
&#x2F;app&#x2F;huawei-mobile-wifi
&#x2F;id546979875?ls=1&amp;mt=8</ios>
<windows/>
</mobileWifi>
<mobileDoctor>
<windowsOS>http:&#x2F;&#x2F;consumer.huawei.com
&#x2F;en&#x2F;support&#x2F;downloads
&#x2F;detail&#x2F;index.htm?id=16921
</windowsOS>
<macOS/>
<linuxOS/>
</mobileDoctor>
</appmanagements>
<commend_enable>0</commend_enable>
<connection>
<enable>1</enable>
<connectionstatus>1</connectionstatus>
</connection>
<position_info>
<offset>0</offset>
<offset_ie6>0</offset_ie6>
</position_info>
<menu>
<home>home</home>
<statistic>statistic</statistic>
<commend>commend</commend>
<sms>
<inbox>smsinbox</inbox>
<sent>smssent</sent>
<drafts>smsdrafts</drafts>
<sms_center_number>messagesettings</sms_center_number>
</sms>
<update>
<update_online>update</update_online>
<update_local>update_local</update_local>
</update>
<ussd>
<prepaid>
<pre_service_title>activate_internet_service
</pre_service_title>
<pre_fun_balanceInquiry>balanceInquiry
</pre_fun_balanceInquiry>
<pre_fun_charge>charge</pre_fun_charge>
<pre_fun_general>general</pre_fun_general>
</prepaid>
<postpaid>
<post_service_title>activate_internet_service
</post_service_title>
<post_fun_balanceInquiry>balanceInquiry
</post_fun_balanceInquiry>
<post_fun_charge>charge</post_fun_charge>
<post_fun_general>general</post_fun_general>
</postpaid>
</ussd>
<settings>
<quick_setup>quicksetup</quick_setup>
<dialup>
<mobileconnection>mobileconnection</mobileconnection>
<profilesmgr>profilesmgr</profilesmgr>
<mobilenetworksettings>mobilenetworksettings
</mobilenetworksettings>
</dialup>
<internet>
<wifinetworks>wifinetworks</wifinetworks>
<wifipriority>wifipriority</wifipriority>
<stationwps>stationwps</stationwps>
</internet>
<wlan>
<wlanbasicsettings>wlanbasicsettings
</wlanbasicsettings>
<wlanadvanced>wlanadvanced</wlanadvanced>
<wlanmacfilter>wlanmacfilter</wlanmacfilter>
<wps>wps</wps>
<dhcp>dhcp</dhcp>
</wlan>
<voip>
<serverbasic>serverbasic</serverbasic>
<voipinformation>voipinformation</voipinformation>
<sipbasic>sipbasic</sipbasic>
<speeddial>speeddial</speeddial>
<sipadvance>sipadvance</sipadvance>
<voiceadvanced>voiceadvanced</voiceadvanced>
<sipvoicecodec>sipvoicecodec</sipvoicecodec>
</voip>
<security>
<pincodemanagement>pincodemanagement
</pincodemanagement>
<firewallswitch>firewallswitch</firewallswitch>
<macfilter>macfilter</macfilter>
<lanipfilter>lanipfilter</lanipfilter>
<virtualserver>virtualserver</virtualserver>
<dmzsettings>dmzsettings</dmzsettings>
<nat>nat</nat>
<ddns>ddns</ddns>
<bridgemode>bridgemode</bridgemode>
<urlfilter>urlfilter</urlfilter>
</security>
<cbssettings>cbssettings</cbssettings>
<system>
<deviceinformation>deviceinformation
</deviceinformation>
<modifypassword>modifypassword</modifypassword>
<diagnosis>diagnosis</diagnosis>
<restore>restore</restore>
<reboot>reboot</reboot>
<systemsettings>systemsettings</systemsettings>
</system>
</settings>
</menu>

/config/global/net-type.xmlGET Config ?<networktypes><index>001</index>
<networktype></networktype></networktypes>
<networktypes><index>002</index>
<networktype></networktype></networktypes>
<networktypes><index>003</index>
<networktype></networktype></networktypes>
<networktypes><index>004</index>
<networktype></networktype></networktypes>
<networktypes><index>005</index>
<networktype></networktype></networktypes>
<networktypes><index>006</index>
<networktype></networktype></networktypes>
<networktypes><index>007</index>
<networktype></networktype></networktypes>
<networktypes><index>008</index>
<networktype></networktype></networktypes>
<networktypes><index>009</index>
<networktype></networktype></networktypes>
<networktypes><index>010</index>
<networktype></networktype></networktypes>
<networktypes><index>011</index>
<networktype></networktype></networktypes>
<networktypes><index>012</index>
<networktype></networktype></networktypes>
<networktypes><index>013</index>
<networktype></networktype></networktypes>
<networktypes><index>015</index>
<networktype></networktype></networktypes>
<networktypes><index>017</index>
<networktype></networktype></networktypes>
<networktypes><index>018</index>
<networktype></networktype></networktypes>
<networktypes><index>019</index>
<networktype></networktype></networktypes>
<networktypes><index>021</index>
<networktype></networktype></networktypes>
<networktypes><index>022</index>
<networktype></networktype></networktypes>
<networktypes><index>023</index>
<networktype></networktype></networktypes>
<networktypes><index>024</index>
<networktype></networktype></networktypes>
<networktypes><index>025</index>
<networktype></networktype></networktypes>
<networktypes><index>026</index>
<networktype></networktype></networktypes>
<networktypes><index>027</index>
<networktype></networktype></networktypes>
<networktypes><index>028</index>
<networktype></networktype></networktypes>
<networktypes><index>029</index>
<networktype></networktype></networktypes>
<networktypes><index>030</index>
<networktype></networktype></networktypes>
<networktypes><index>031</index>
<networktype></networktype></networktypes>
<networktypes><index>032</index>
<networktype></networktype></networktypes>
<networktypes><index>033</index>
<networktype></networktype></networktypes>
<networktypes><index>034</index>
<networktype></networktype></networktypes>
<networktypes><index>035</index>
<networktype></networktype></networktypes>
<networktypes><index>036</index>
<networktype></networktype></networktypes>
<networktypes><index>041</index>
<networktype></networktype></networktypes>
<networktypes><index>042</index>
<networktype></networktype></networktypes>
<networktypes><index>043</index>
<networktype></networktype></networktypes>
<networktypes><index>044</index>
<networktype></networktype></networktypes>
<networktypes><index>045</index>
<networktype></networktype></networktypes>
<networktypes><index>046</index>
<networktype></networktype></networktypes>
<networktypes><index>061</index>
<networktype></networktype></networktypes>
<networktypes><index>062</index>
<networktype></networktype></networktypes>
<networktypes><index>063</index>
<networktype></networktype></networktypes>
<networktypes><index>064</index>
<networktype></networktype></networktypes>
<networktypes><index>065</index>
<networktype></networktype></networktypes>
<networktypes><index>101</index>
<networktype></networktype></networktypes>
/config/pcassistant/config.xmlGET  <!-- 特性开关(要增加这个开关,与其他模块统一) -->
<enable>0</enable>


<!-- PC助手页面链接地址 -->
<winpath>http://www.huaweidevice.com/resource
/mini/201105202018/bolt-card/setup_win.exe</winpath>
<macpath>http://www.huaweidevice.com/resource
/mini/201105202018/bolt-card/setup_mac.zip</macpath>
<upgradepath>http://support.microsoft.com/hotfix/KBHotfix.aspx?kbnum=945436kbln=zh-cn</upgradepath>

/config/global/languagelist.xmlGET  <languages>
<!-- UI显示的语言列表 -->
<language>de-de</language>
<language>en-us</language>
</languages>
<privacy_policy_url>
<default_url>http://consumer.huawei.com/en/privacy-policy/index.htm</default_url>
<en_us>http://consumer.huawei.com/en/privacy-policy/index.htm</en_us>        
<zh_cn>http://consumer.huawei.com/cn/privacy-policy/index.htm</zh_cn>        
</privacy_policy_url>


<usermanual_language>
<default_language>de-de</default_language>
<support_language>
<language>en-us</language>        
<language>de-de</language>        
</support_language>
</usermanual_language>

/config/deviceinformation/config.xmlGET  <devicename>1</devicename>
<serialnumber>0</serialnumber>
<imei>1</imei>
<imsi>1</imsi>
<iccid>0</iccid>
<msisdn>1</msisdn>
<hardwareversion>1</hardwareversion>
<softwareversion>1</softwareversion>
<webuiversion>1</webuiversion>
<macaddress1>1</macaddress1>
<macaddress2>0</macaddress2>
<productfamily>0</productfamily>
<classify>0</classify>
<wanipaddress>1</wanipaddress>
<wanipv6address>0</wanipv6address>
<esn>0</esn>
<meid>0</meid>
<pci>0</pci>
<sc>0</sc>
<cell_id>0</cell_id>
<rsrq>0</rsrq>
<rsrp>0</rsrp>
<rssi>0</rssi>
<sinr>0</sinr>
<rscp>0</rscp>
<ecio>0</ecio>
/config/webuicfg/config.xmlGET  <lanipfilter>
<wan>1</wan>
<number>16</number>
<lan_enable>1</lan_enable>
<protocol_imcp>1</protocol_imcp>
</lanipfilter>
<specialapplication>
<number>16</number>
</specialapplication>
<virtualserver>
<number>16</number>
</virtualserver>
<firewallwanportpingswitch_enable>1
</firewallwanportpingswitch_enable>
<urlfilter><number>16</number></urlfilter>
<dialog_new_version>1</dialog_new_version>  
<install_processbar_enable>1
</install_processbar_enable>
<install_processbar_speed>1
</install_processbar_speed>
/api/cradle/status-infoGET  <cradlestatus>0</cradlestatus>
<connectstatus>902</connectstatus>
<connectionmode>5</connectionmode>
<currenttime>0</currenttime>
<macaddress>38:F8:89:38:F8:89</macaddress>
<ipaddress></ipaddress>
<netmask></netmask>
<gateway></gateway>
<primarydns></primarydns>
<secondarydns></secondarydns>
/api/device/autorun-versionGET Radio hardware version?<Version>22.001.07.00.03</Version>
/api/device/basic_informationGET LTE, customer premises equipment<productfamily>LTE</productfamily>
<classify>cpe</classify>
<multimode>0</multimode>
/api/device/control?   
/api/device/device-feature-switchGET  <coulometer_enabled>0</coulometer_enabled>
<copyright_enabled>1</copyright_enabled>
/api/device/informationGET Android-side version information<DeviceName>E5186s-22a</DeviceName>
<SerialNumber>W</SerialNumber>
<Imei>8643910</Imei>
<Imsi>2</Imsi>
<Iccid>8</Iccid>
<Msisdn>041</Msisdn>
<HardwareVersion>CL1E5175HM</HardwareVersion>
<SoftwareVersion>21.298.00.00.55</SoftwareVersion>
<WebUIVersion>16.100.02.00.03</WebUIVersion>
<MacAddress1>38:F8:89:38:F8:89</MacAddress1>
<MacAddress2></MacAddress2>
<ProductFamily>LTE</ProductFamily>
<Classify>cpe</Classify>
<supportmode></supportmode>
<workmode>LTE</workmode>
/api/device/signalGET Cell ID and signal quality parameters: RSRQ, RSRP, RSSI, SINR, RSCP, Ec/Io<pci>82</pci>
<sc></sc>
<cell_id>551</cell_id>
<rsrq>-6dB</rsrq>
<rsrp>-102dBm</rsrp>
<rssi>-89dBm</rssi>
<sinr>3dB</sinr>
<rscp></rscp>
<ecio></ecio>
<mode>7</mode>
/api/device/usb-tethering-switch?   
/api/dialup/connectionGET  <RoamAutoConnectEnable>0</RoamAutoConnectEnable>
<MaxIdelTime>600</MaxIdelTime>
<ConnectMode>0</ConnectMode>
<MTU>1500</MTU>
<auto_dial_switch>1</auto_dial_switch>
/api/dialup/dial?   
/api/dialup/mobile-dataswitchGET  <dataswitch>1</dataswitch>
/api/global/module-switchGET Features of the router<ussd_enabled>0</ussd_enabled>
<bbou_enabled>1</bbou_enabled>
<sms_enabled>1</sms_enabled>
<sdcard_enabled>0</sdcard_enabled>
<wifi_enabled>1</wifi_enabled>
<statistic_enabled>1</statistic_enabled>
<help_enabled>1</help_enabled>
<stk_enabled>0</stk_enabled>
<pb_enabled>0</pb_enabled>
<dlna_enabled>0</dlna_enabled>
<ota_enabled>0</ota_enabled>
<wifioffload_enabled>0</wifioffload_enabled>
<cradle_enabled>1</cradle_enabled>
<multssid_enable>1</multssid_enable>
<ipv6_enabled>0</ipv6_enabled>
<monthly_volume_enabled>1</monthly_volume_enabled>
<powersave_enabled>0</powersave_enabled>
<sntp_enabled>0</sntp_enabled>
<dataswitch_enabled>1</dataswitch_enabled>
<ddns_enabled>0</ddns_enabled>
<sambashare_enabled>0</sambashare_enabled>
<poweroff_enabled>0</poweroff_enabled>
<fw_macfilter_enabled>1</fw_macfilter_enabled>
<ecomode_enabled>1</ecomode_enabled>
<zonetime_enabled>0</zonetime_enabled>
<diagnosis_enabled>1</diagnosis_enabled>
<localupdate_enabled>1</localupdate_enabled>
<cbs_enabled>0</cbs_enabled>
<qrcode_enabled>0</qrcode_enabled>
<charger_enbaled>0</charger_enbaled>
/api/host/infoPOST Web-admin client information for the router<Time>20150315223426</Time>
<Timezone>GMT+02:00</Timezone>
<Platform>Win32</Platform>
<PlatformVer>Mozilla/5.0 (Windows NT 6.1; WOW64; rv:36.0) Gecko/20100101 Firefox/36.0</PlatformVer>
<Navigator>5.0 (Windows)</Navigator>
<NavigatorVer>Mozilla/5.0 (Windows NT 6.1; WOW64; rv:36.0) Gecko/20100101 Firefox/36.0</NavigatorVer>
/api/language/current-languageGET Selected language. There is a list of supported languages at /config/global/languagelist.xml<CurrentLanguage>en-us</CurrentLanguage>
/api/monitoring/check-notificationsGET  <UnreadMessage>0</UnreadMessage>
<SmsStorageFull>0</SmsStorageFull>
<OnlineUpdateStatus>14</OnlineUpdateStatus>
/api/monitoring/converged-statusGET SIM info<SimState>257</SimState>
<SimLockEnable>0</SimLockEnable>
<CurrentLanguage>en-us</CurrentLanguage>
/api/monitoring/statusGET  <ConnectionStatus>901</ConnectionStatus>
<WifiConnectionStatus></WifiConnectionStatus>
<SignalStrength></SignalStrength>
<SignalIcon>3</SignalIcon>
<CurrentNetworkType>101</CurrentNetworkType>
<CurrentServiceDomain>3</CurrentServiceDomain>
<RoamingStatus>0</RoamingStatus>
<BatteryStatus></BatteryStatus>
<BatteryLevel></BatteryLevel>
<BatteryPercent></BatteryPercent>
<simlockStatus>0</simlockStatus>
<WanIPAddress>37.33.207.127</WanIPAddress>
<WanIPv6Address></WanIPv6Address>
<PrimaryDns>62.241.198.245</PrimaryDns>
<SecondaryDns>62.241.198.246</SecondaryDns>
<PrimaryIPv6Dns></PrimaryIPv6Dns>
<SecondaryIPv6Dns></SecondaryIPv6Dns>
<CurrentWifiUser>0</CurrentWifiUser>
<TotalWifiUser>64</TotalWifiUser>
<currenttotalwifiuser>64</currenttotalwifiuser>
<ServiceStatus>2</ServiceStatus>
<SimStatus>1</SimStatus>
<WifiStatus>0</WifiStatus>
<CurrentNetworkTypeEx>101</CurrentNetworkTypeEx>
<maxsignal>5</maxsignal>
<wifiindooronly>0</wifiindooronly>
<wififrequence>0</wififrequence>
<classify>cpe</classify>
<flymode>0</flymode>
<cellroam>1</cellroam>
<ltecastatus>0</ltecastatus>
/api/monitoring/traffic-statisticsGET Traffic transferred<CurrentConnectTime>243360</CurrentConnectTime>
<CurrentUpload>244020</CurrentUpload>
<CurrentDownload>1135754</CurrentDownload>
<CurrentDownloadRate>0</CurrentDownloadRate>
<CurrentUploadRate>0</CurrentUploadRate>
<TotalUpload>90688300183</TotalUpload>
<TotalDownload>250205129647</TotalDownload>
<TotalConnectTime>10613008</TotalConnectTime>
<showtraffic>1</showtraffic>
/api/net/current-plmnGET Public Land Mobile Network information<State>0</State>
<FullName>DNA</FullName>
<ShortName>DNA</ShortName>
<Numeric>24412</Numeric>
<Rat>7</Rat>
/api/online-update/upgrade-messageboxGET  <messagebox>1</messagebox>
/api/pin/statusGET Extended SIM information<SimState>257</SimState>
<PinOptState>258</PinOptState>
<SimPinTimes>3</SimPinTimes>
<SimPukTimes>10</SimPukTimes>
/api/redirection/homepageGET  <EnableRedirection>0</EnableRedirection>
<Homepage></Homepage>
/api/security/bridgemode? ? Enable bridge-mode 
/api/security/upnpGET, POST Query or set Universal Plug and Play setting<UpnpStatus>1</UpnpStatus>
/api/sms/get-cbsnewslist?   
/api/sms/sms-list?   
/api/user/loginPOST Log in an admin-user<Username>admin</Username>
<Password>-password-hash-</Password>
<password_type>4</password_type>
/api/user/logoutPOST Log out an already logged in user<Logout>1</Logout>
/api/user/remindGET  <remindstate>1</remindstate>
/api/user/session?   
/api/user/state-loginGET 

State = -1 no logged in user
Password type = 4 for SHA-256 hashed password with token

<State>-1</State>
<Username></Username>
<password_type>4</password_type>
/api/ussd/get?   
/api/webserver/token? Get a new security token 
/api/wlan/basic-settingsGET WiFi setup information<WifiSsid>Huawei5186_2.4</WifiSsid>
<WifiChannel>9</WifiChannel>
<WifiHide>0</WifiHide>
<WifiCountry>ALL</WifiCountry>
<WifiMode>b&#x2F;g&#x2F;n</WifiMode>
<WifiRate>0</WifiRate>
<WifiTxPwrPcnt>100</WifiTxPwrPcnt>
<WifiMaxAssoc>32</WifiMaxAssoc>
<WifiEnable>1</WifiEnable>
<WifiFrgThrshld>2346</WifiFrgThrshld>
<WifiRtsThrshld>2347</WifiRtsThrshld>
<WifiDtmIntvl>1</WifiDtmIntvl>
<WifiBcnIntvl>100</WifiBcnIntvl>
<WifiWme>1</WifiWme>
<WifiPamode>0</WifiPamode>
<WifiIsolate>0</WifiIsolate>
<WifiProtectionmode>1</WifiProtectionmode>
<Wifioffenable>1</Wifioffenable>
<Wifiofftime>600</Wifiofftime>
<wifibandwidth>0</wifibandwidth>
<wifiautocountryswitch>0</wifiautocountryswitch>
<WifiRestart>0</WifiRestart>
/api/wlan/handover-setting?   
/api/wlan/multi-security-settings?   
/api/wlan/multi-switch-settingsGET  <multissidstatus>1</multissidstatus>
/api/wlan/station-information?   
/api/wlan/wifi-feature-switchGET WiFi features<wifi5g_enabled>1</wifi5g_enabled>
<wifiautocountry_enabled>0</wifiautocountry_enabled>
<maxapnum>2</maxapnum>
<isdoublechip>1</isdoublechip>
<acmode_enable>1</acmode_enable>
<stawpsenabled>0</stawpsenabled>
<opennonewps_enable>1</opennonewps_enable>
<stafrequenceenable>0</stafrequenceenable>
<wifi24g_switch_enable>1</wifi24g_switch_enable>
<wifi_dfs_enable>0</wifi_dfs_enable>
/api/net/net-modeGET, POST Mode lock (2G/3G/4G), frequency lock. Bitmask with Huawei values.<NetworkMode>03</NetworkMode>
<NetworkBand>3FFFFFFF</NetworkBand>
<LTEBand>800C5</LTEBand>
     

All of the API-calls require a valid session cookie set to respond. Some commands require a logged in user for access, some don't. I won't be able to maintain this list, as I don't own an E5186, but I'll update this if I find something interesting.

Later I will publish a tool to allow full bi-directional access.

Official PHP-packages from Parallels

$
0
0

Last year I spent couple of days tinkering PHP-packages that will work on my Parallels Plesk Panel box. To my surprise, my box failed to auto-upgrade itself. The reason was: "Exception: Failed to solve dependencies:
plesk-php54-mysqlnd-5.4.31-1.el6.x86_64 requires plesk-php54-pdo = 5.4.31-1.el6
plesk-php55-mysqlnd-5.5.6-1.el6.x86_64 requires plesk-php55-pdo = 5.5.6-1.el6
". I was dumbfounded, as the proper packages were already installed.

A closer inspection revealed, that packages from my own repository weren't good for installation. There were package dependencies, that required packages with exactly the same name, but from somebody else's repository.

Here are some links:

If you need to install new version, do something like this:

yum install --enablerepo PHP_5_6_8-dist plesk-php56-cli

The information for those came from file /etc/yum.repos.d/autoinstaller-sources.repo.

My only conclusion is, that Parallels guys took my source RPMs and created their own. Thanks for ripping me off! :-)
Ok, this is open-source. I put my stuff out there willingly and knowing, that somebody eventually will use it. The sensible thing to do is to give appropriate credit, though. That one the big greedy corporation didn't do.

HighPoint RocketRAID 620 Linux driver

$
0
0

I've had my run of bad things with Intel soft-RAID earlier. The constant RAID-verify -runs made me want stop using it. As its my Windows-box, I just wanted something that is hardware-based, reasonably fast and affordable. My choice is HighPoint RocketRAID 620.

For a switch-over -project I had a simple plan:

  1. Clonezilla the existing RAID into an another drive which I could plug into a motherboard for the duration of the move
  2. Un-configure the Intel soft-RAID at the motherboard
  3. Plug in the RocketRAID-card
  4. Change the hard-drive cables from motherboard RAID-connectors into RocketRAID-card
  5. Configure a new RAID-1 mirror wit RocketRAID
  6. Clonezilla the data back to the newly created RAID-1 volume
  7. Be happy and continue computing

Guess what. Things fell trough at point #6. I was using an USB-bootable Clonezilla live on my first data move and obviously was planning to use it for the second one too. Whichever Linux-distro they use as the base for Clonezilla, they don't have the driver for the RAID-card. Darn!

The next best thing is a commercial distro for Clonezilla, Parted Magic. They used to be free (as in beer and speech), but they went commercial. The price is $9 USD for a single download, so I got it. And guess what again! They don't support Highpoint RocketRAID either. :-(

I did ask about it in their support forums (closed to registered users only, sorry). And they replied:

We do not do "random" out-of-tree drivers because commonly these are supported by their vendors in a haphazard way. E.g. in the HighPoint case the latest driver is 3 versions behind our kernel version.

Luckily the vendor is providing the partial source code for the driver. There is a binary-part of in it and it is kind-of open-source. The biggest problem seems to be, that it doesn't build on any reasonably modern Linux.

By googling, I found that somebody else had the same process of thought and there was a Github project for the upgraded driver. Unfortunately that too was 3 years old and wouldn't build. Also it was for the vendor driver 1.1, and they already had 1.2 out.

In this imperfect world everything that you need to be done properly, you need to do by yourself. So, here it is: https://github.com/HQJaTu/rr62x
You can help yourselves with that one.

This is how it looks on my dmesg:

[ 85.518732] rr62x: module license 'Proprietary' taints kernel.
[ 85.518737] Disabling lock debugging due to kernel taint
[ 85.519709] rr62x:RocketRAID 62x SATA controller driver v1.2 (Jul 1 2012)

[ 85.735773] rr62x:adapter at PCI 3:0:0, IRQ 16
[ 85.950487] rr62x:[0 0 ] start port.
[ 85.950488] rr62x:[0 0 ] start port hard reset (probe 1).
[ 86.150712] rr62x:[0 1 ] start port.
[ 86.150712] rr62x:[0 1 ] start port hard reset (probe 1).
[ 89.093649] rr62x:[0 0 ] start port soft reset (probe 1).
[ 89.841048] rr62x:[0 1 ] start port soft reset (probe 1).
[ 90.501075] rr62x:[0 0 ] port started successfully.
[ 90.501078] rr62x:[0 0 0] device probed successfully.
[ 90.791364] rr62x:[0 1 ] port started successfully.
[ 90.791369] rr62x:[0 1 0] device probed successfully.
[ 90.806570] scsi host13: rr62x
[ 90.806870] scsi 13:0:0:0: Direct-Access HPT DISK_13_0 4.00 PQ: 0 ANSI: 5
[ 90.809711] sd 13:0:0:0: [sdd] 2930114560 512-byte logical blocks: (1.50 TB/1.36 TiB) [ 90.809847] sd 13:0:0:0: [sdd] Write Protect is off
[ 90.809852] sd 13:0:0:0: [sdd] Mode Sense: 2f 00 00 00
[ 90.809909] sd 13:0:0:0: [sdd] Write cache: disabled, read cache: enabled, doesn't support DPO or FUA
[ 90.832339] sdd: unknown partition table
[ 90.832903] sd 13:0:0:0: [sdd] Attached SCSI disk

I've tested that with Linux 4.0.4 and 3.19.3. It builds and works on both. Any comments, Github forks, pull requests, etc. are welcome. I will get back to the actual disk cloning project later, the driver won't  help unless it is used properly in an operating system.

Back to blogging

$
0
0

Some of my avid readers have been dropping me comments on some of my posts asking what's going on. Actually couple of persons contacted me outside this blog and asked the same.

On August I wrote:

It's just that new house with lawn, fence, and all other sorts of construction kept me really busy during summer. Not to mention that my motorcycle had problem with carburetor and when I got that fixed, the alternator broke. Darn!

Wait for the bad weather to kick in, I'll be back with computing-projects after that.

To put it briefly, I just had too much to do and as writing here is something I love to do, but only if it doesn't prevent me doing something more important.

Lately I've had more time to concentrate on the computing for more than my work requires. There are some comments, that require my attention to write new code and to fix my old things. So, I'll get back to them.

Thanks for reading!

Storix - Story of Anthony Johnson

$
0
0

Epilogue

This story is so unbelievable, I have to share it with all of you. It has Hollywood material in it: it's a story about a hard working man who succeeds and then gets dealt bad cards. As the final good thing he does share his fortune with people he trusts. Then there is the surprising twist in the plot and he bounces back. The real surprise is when the ungrateful people don't want him back. That results in a bitter fight in the court. But as in all Hollywood flicks, there is a happy end.

All this started years ago, but my version starts two days ago when I received an e-mail. I found it from my spam-box and my initial glace was, that it was some kind of 419-scam. Something in the style of the text struck me as a scam, so I was just about to file a report of it into SpamCop, and then I saw the subject of the mail. It had word Storix in it. The mail was sent to one of my ancient addresses, which I had used with Storix. A random bulk spam wouldn't be about Storix, backups aren't that lucrative when compared to regular spam-topics, women, money or medicine.

The e-mail

This is the entire e-mail as I received it:

Subject: Notice of Copyright Infringement by Storix, Inc.
Date: Tue, 6 Oct 2015 16:15:31 -0700
 
Dear Sir or Madam,
This letter is to inform you that you may be in possession of unauthorized and infringing copies of Storix System Backup Administrator (SBAdmin). I am the author of the software, which is protected by US Copyright Registration No. TXu000988741, and expert testimony in the US Southern California District Court case No. 14-cv-1873 H (BLM) has
indisputably determined that I am the owner, have never transferred, nor received any consideration for its license by Storix.
 
I hold none of Storix' customers or business partners accountable, and you may continue using the current software, even if you received an infringing license after it was revoked. However, I must demand that you cease any further payment to Storix in relation to this software and refrain from downloading any further copies.
 
I founded Storix in, Inc in 2003 to sell and support the software I had already been marketing since 1999. In 2011 I was diagnosed with terminal cancer and gifted 60% of the company shares to long term employees before taking my medical leave. Those shareholders then elected themselves as directors and officers of the corporation:
 
David Huffman, President and CEO
Richard Turner, Director of Software Development
Manuel Altamirano, Director of Sales and Marketing
David Kinney, Director of Software Support
 
No new programmers were hired, and the software has now seen little change in over 4 years. After an unlikely recovery, I returned to the company full time in 2013 to continue development of the software, working alone for 9 months on major enhancements to address known security vulnerabilities and increase the network security. After requesting that others assist in the final development and testing, I was harassed by my former employees until I left in May, 2014.
 
After exhausting every effort to negotiate, the board was notified that I would assert my rights to the software if not given a position of control over its development. Instead, they chose to challenge my copyright. Using my remaining 40% stock, I took control of 2 board seats, but not before a 5th seat was added and occupied by David Smilkjovich, the new CEO and personal friend of Mr. Huffman. Every effort since to save the company, its employees and customers from the damages of this litigation has failed in a 3/2 vote.
 
As Storix has been well aware since my departure, I continued development of the software, believing we would eventually work out our differences. I made no effort to disparage or compete with Storix in any way. Yet, as a decision in the copyright case grew near, they filed new action against me for unfair competition and breach of duty as a company director (San Diego County Superior Court No. 37-2017-00028262-CU-BT-CTL). After I warned them in advance of this very notice, they requested, and were denied, a motion for temporary restraining order (San Diego US District Court Court No. 14-cv-1873 H
(BLM)).
 
Although a plaintiff in the copyright case, I'm also a 40% shareholder and a director of the company, and am obligated to do everything possible to put an end to this nonsense before the company is lost. Iwould have preferred the customers and employees remain unaware of this needless battle, but the actions taken by these individuals to protect their majority positions have resulted in the company becoming unprofitable for the first time in its history. They will accept no personal responsibility or compromise, and are now turning to a new employee stock incentive program to cover their losses. This nonsense
cannot continue.
 
The security enhancements to the software have been completed, along with much more. Unfortunately, far too much damage has been done to me personally and financially to allow these greedy individuals to profit from my work any longer. Many of you I had worked with personally for many years, so it pains me to inform you that support for Storix SBAdmin
will very likely end when a ruling is made on the copyright case at the end of the month.
 
Whatever the eventual outcome, I sincerely hope to rebuild your trust as well as the thriving company and innovative product I once had.
 
Best Regards,
Anthony Johnson
Author and Owner of Storix Backup Administrator
Former President/CEO, Storix Inc.

Show me the proof!

Ok, this is all sad and cool at the same time, but how do we know that all this is legit? I don't have any solid proof, but here is what I have:

  • My own records indicate, I've been using Storix back in 2004 to 2009 when I did DLT backups. Then the company got greedy and the price of licence went out of my reach. At that point, I stopped doing tape-backups and went for Bacula and USB-drives. Software free and USB-drives are very inexpensive to store backups.
  • The e-mail in question may very well be sent to me, because I have a customer account at Storix, Inc.
  • In the e-mail Mr. Johnson wants you to: pretty much do nothing, he doesn't want your money, he just says not to pay any more to the software company not owning copyright of his work, but he does not want you to pay him for it. Asking for nothing is not a typical request in spam.
  • Motive: What would be the alternate motivation or hidden agenda for doing this? Throwing mud at his own company? Slinging mud at some people he doesn't like (anymore)? I guess, the classic ones: money and power have something to do with this. Depleting Storix, Inc. main source of turnover is the primary motive.
  • The origin of the mail is from Google. Yes, there is some Google spam, but no way it can be considered as a major source of crap.
  • Google got the mail from a Comcast user located in Miami, Florida. Again, there is no typical source of hijacked computer, it can be any, even from Florida. However, it would be very unlikely scenario for a malware to hijack Google credentials for sending misinformation from a random Comcast user.
  • There is a man in Linkedin with name Anthony Johnson claiming to be author of Storix
  • There is a man in Linkedin with name David Huffman claiming to be the CEO of Storix, inc. He is registered as the president of the business entity C2494479 in California.
  • There is a legal case 3:14-cv-01873-H-BLM in California Southern District Court, it is Johnson v. Storix, Inc.:
  • If assumed, that the judge ruled as the e-mail explains, it would be obvious for not to pay for a product to somebody who doesn't own it. That would be fraud if anybody else than a legal owner would ask for you money.

When all of this is combined, there are two possible scenarios left: either this is the weirdest scam I've seen, or it is all true. My take here is: after looking, searching and using my own judgement, I believe the above story of a complete stranger. I sympathize all that happened to him. I also believe, that people shouldn't be thrown out of their own companies, that's just wrong.

Pitch in with a comment, if you have some knowledge of this. I'll be waiting for the movie. :-)

Update 9th Oct 2015:

It's given, that I replied to the mail. I sent the link to this article and told that he has my support.
This is what he wrote back: "Wow, quite an endorsement, and no, it's definitely not a scam. Thanks!"

OS X El Capitan upgrade from USB-stick

$
0
0

Now that OS X El Capitan or version 11 is out, I'll do a refresh for the USB installation instructions.

The thing is ... the upgrade free, but it's big. The amount of downloading needed is easily 6+ GiB. I have 3 Macs to update and I don't want to download the huge package on all of them. So, let's figure out something smarter.

Step 0: Prerequisites

You'll need a bootable USB-stick with capacity of 8 GiB or more. All sticks should boot, but I have encountered some that didn't manage that.

USB-booting a Mac is trickier than a PC. The knowledge base article HT1948 states:
Intel-based Macs support starting from an external USB storage device's volume that:

  • Has been formatted with a GUID partition type
  • Contains an installation of Mac OS X 10.4.5 or later, or Mac OS X 10.5 or later, which is compatible with (or shipped with) the Mac that the USB device is connected to. Note: You should not use a version of Mac OS X that is earlier ("older") than the version your Mac shipped with.

So, if you just bought an USB-stick, the chances are, that it is MBR-partitioned FAT32. That's my experience of getting new ones. They are incompatible at their current state for USB-booting a Mac. Not to worry, that can be fixed!

If you happen to have a ready-made stick for any previous OS X version, that obviously can be loaded with new installer. You can even skip couple of things during the process as you don't have to reformat the stick.

Step 1: Go download

In your Apple menu (the top left apple-shaped thing at every program's menu), go for Software Update. An alternate is to click the App Store link:

Both options land you on the App Store main screen showing you something like this:

Click the image saying Free Upgrade (free as in beer):

Your Apple ID credentials are required for this free package. They'll keep track of who downloaded and what.

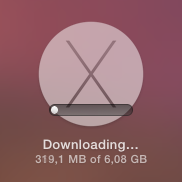
This is the part you'll wait for the download to complete:

When it's all on your machine, the installer will automatically kick in.

Step 2: Go USB

Now that you have the thing in your drive, don't proceed with the upgrade.

When you reach this screen:

do not proceed! You can quit the installer, if you want:

It won't delete the files from your drive. It is also possible to continue installing on that Mac, but don't do it yet. Take a copy of the files first.

Take at least a 8 GiB USB-storage. 4 won't do it, but any larger will. In my case, the USB-stick appeared as /dev/disk3. That may vary on your system. Also it is possible to use some GUI-tools on OS X to format your drives, but as a Linux-nerd I don't know about them.

It is very likely, that the disk is mounted and will display an icon on your desktop, and will appear on your Finder. The diskutil will unmount it automatically on partition, but I wanted to make sure and did:

# sudo diskutil umount /Volumes/MyUSBdrive

Next step is to make sure, the stick is in a Mac-format (this needs to be run as root, that's what the sudo is for). This will partition and format the entire stick into Mac-use:

# sudo /bin/bash
root# diskutil partitionDisk /dev/disk3 1 GPT jhfs+ "OS X El Capitan" 0b

It will say something like this as a result:

Started partitioning on disk3
Unmounting disk
Creating the partition map
Waiting for the disks to reappear
Formatting disk3s2 as Mac OS Extended (Journaled) with name OS X El Capitan
Initialized /dev/rdisk3s2 as a 7 GB case-insensitive HFS Plus volume with a 8192k journal
Mounting disk
Finished partitioning on disk3
/dev/disk3
#: TYPE NAME SIZE IDENTIFIER
0: GUID_partition_scheme *8.0 GB disk3
1: EFI EFI 209.7 MB disk3s1
2: Apple_HFS OS X El Capitan 7.7 GB disk3s2

Next thing is to confirm, that the volume with given name will be mounted:

root# ls -l /Volumes/
total 40
lrwxr-xr-x 1 root admin 1 Aug 29 12:24 Macintosh HD -> /
drwxrwxr-x 7 root wheel 306 Oct 10 12:41 OS X El Capitan

If it does, you're ready to go. Copy the thing into it:

root# cd /Applications/Install\ OS\ X\ El\ Capitan.app/Contents/Resources/
root# ./createinstallmedia --volume /Volumes/OS\ X\ El\ Capitan/ \
--applicationpath /Applications/Install\ OS\ X\ El\ Capitan.app/ \
--nointeraction

It will result in a lengthy process saying:

Erasing Disk: 0%... 10%... 20%... 30%...100%...
Copying installer files to disk...
Copy complete.
Making disk bootable...
Copying boot files...
Copy complete.
Done.

Step 3: Go update

Your stick is ready. This is the part you will be replicating to any of your Macs you want to upgrade.

Reboot the Mac and make sure to boot from the USB. This can be achieved by pressing down option-key during boot:

The official Apple instruction at knowlegebase article HT1948 states:
To start from a USB storage device that meets the above requirements:

  1. connect the device
  2. restart
  3. immediately press and hold the Option key to access Startup Manager

If you successfully followed the steps, you will end up in Mac boot manager:

In that, you pretty much select the drive you want to boot from. In this particular case, making a choice for the recently prepared USB-stick will be a good one. Click the orange "Install OS X El Capitan". Both the gray HD and the network selection are there to confuse you. Ignore them and double click the USB-drive.

Most steps in this upgrade will include lot of waiting. Make sure that you have reserved couple of hours for the upgrade. Screens like this will become familiar to you:

Most time estimates are wild guesses. A 9 minute wait in reality is something like 45 minutes. Eventually the USB-stick finishes booting, and you will end up in a screen saying "To set up the installation of OS X, click Continue". Most screens will refer your upgrade as an install. It is nerve-wrecking thing, because you don't know if it is going to wipe your settings and data, or do a nice upgrade what you'd be expecting. My experience is, that it will upgrade nicely, but it won't say it properly.

Then there is a license screen which you must agree to continue. Then land on OS X Utilities. One thing you can do with a bootable stick is to upgrade or install an OS X:

When you select to go for upgrade or install, there is a welcome to OS X El Capitan screen. Click Continue. Yet another license screen appears. Click Agree and for the confirmation dialog: I have read and agree to the terms of the software license agreement, Agree. Select the install/upgrade destination as the one having a hard drive icon Macintosh HD (typical installations have that), then click Install. As the first thing, the installer/upgrader will prepare for the operation and then go for the real thing:

This is the most time-consuming part. After a minute or so, there will be an not-so-accurate estimate of time remaining for the preparation. When it has run its course, the actual installer will start. So if the screen says 1 minute left, do not believe it for a second. In my iMac, one cup of coffee doesn't do it. You can easily cook and eat a meal and then have the coffee while the installer/upgrader runs. Especially the final phase saying "About a second remaining" will take ages. My hardware isn't especially old or slow, but ... the process is.

Step 4: Finishing touches

After you've done your waiting. A reboot will result. At this point you'll need to login into your precious upgraded Mac with your local user account.

On successful login, you will end up in the OOBE (or out-of-box experience). Apple makes an effort to not allow stolen hardware to be used and they pretty much require you to login to Apple ID during install:

Since I have a 2-factor authentication enabled for my Apple ID, a 2FA-screen will appear during the process:

There are steps about sending your usage data to Apple. Then yet another license screen which you have to agree twice. First on the bottom screen and then on the pop-up that will appear. So if you want to complain later, they'll just say "but you did agree to our terms and conditions". It will look like this:

The last question you'll need to answer is about setting up iCloud Keychain. I choose not to share my passwords into any cloud services, but at this point you'll have the option to enable Keychain:

Little bit of setting up ... this one won't take long. And then you're pretty much done. Finally your upgrade is ready!

Step 5: Done!

Login for the first time:

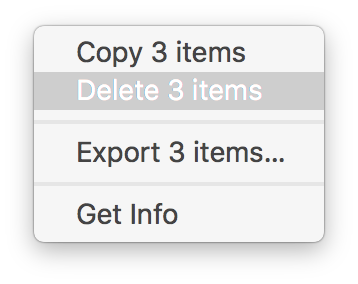
One of the first things I did, was eject my USB-stick (there were couple other Macs to be updated, too):

At this point, you can continue using your precious Mac.

Aftermath

I updated anyway, as a nerd I like the latest stuff running on my computers. I should yield less problems and there needs to be some progress. I find myself stating the same thing in couple of my blog posts, "it wasn't worth it, but I did it anyway". With computers, it never will result any good to stand still and ignore future.


Suomen yritystietopankki SYTP - Anatomy of an Invoicing scam (Finnish)

$
0
0

The mailman brought me a nice and official looking letter. I didn't recognize the sender from the envelope, so I just opened it as anybody would do. It was in invoice from a Finnish company I've never heard:

On a cursory glance it says I have to pay 249,- € for this company for something they really don't specify.

By Googling, I found a (Finnish) thread about that at http://murobbs.muropaketti.com/threads/suomen-yritystietopankki-sytp-huijauskirje-nigerialaiseen-tapaan.1254838/.

Timing

Why do I receive this today, on this Tuesday? "By chance, they just happened to act now", pretty much everybody says.

I don't. Its a school holiday week in Southern Finland this week. A lot of companies are using less experienced personnel in their daily operations this week. A social hack will work much better to untrained people.

Invoice, front

On the invoice they have all my details. However, as many countries, also Finland has a public registry of all the companies and corporations at YTJ. The information is actually on sale as bulk in many formats and you can even subscribe to a update-stream to always have the most recent information at your own use in a server processable format. So, they got all that right to drop all doubt that I might have.

Corporate Info

This is the upper right corner of the invoice:

It doesn't have the business ID. All legit companies have it there clearly visible. That's because the VAT legislation forces you to have your BIS available easily. The information can be read in a very fine print next to their payment information.

Their business registration information is as follows:

It says, that the company was founded in November 2014. However, they activated this company into VAT-registrer September this year. I read that as somebody just popping a shelf-company out of desktop drawer into action.

The really funny thing is, that they don't have a phone number in their info. That's more than weird for any legit business. Typically you want to be contacted when needed.

Corporate Address

The address in Finland as stated by the "invoice"  (Google Maps):

Lautatarhankatu 6
00580 HELSINKI

It happens to be 1Office's Helsinki location. These scamsters will have a seemingly legit office location. In a place where a virtual address will cost them no more than 65,- € per month.

The bold part

This is what they want you to look at:

That information would be typical for an invoice. Invoice date, due date, reference and amount. If you don't look closely enough, you would process this one and have it paid at due date.

The real deal

For legal reasons, they don't say Invoice anywhere in the "Invoice". They say, it's an offer to publish your company information upon payment:

If that monster of a term sounds confusing to you, good, that's their intention. In a court of law, they'd just say that they sent offers to companies. However, their "offers" look very much like invoices.

The text in the middle is saying in a threatening manner: "we will remove your business information from our records, unless you pay this amount" is really funny. What I'd love to have is my information removed! :-)

To make all that more threatening, they're saying that "if you want to re-enable your record, the cost will be 540,- €". That's ballsy!

Bank information

It would be a safe assumption that the bank account FI39 570 4320 0254 68 is a valid one. They'll most likely accept any money you'll send to them. :-) In case of trouble, don't worry, you won't get it back.

Corporate Website

Domain

The domain of suomenyritystietopankki.fi is registered to Suomen Yritystietopankki SYTP Oy, 2654517-2.

That is not surprising, but the fact that there is a responsible person for domain is a surprise. The name they gave is: Gyula Katona. I would find it hard to believe, that the Hungarian mathemacian has anything to do with that domain. Most likely fake information.

The technical contact is Domain Directors (Finland) Oy. Yet another valid company, but it is not in tax prepayment or VAT-registers. That is a definite sign of non-active company frozen and shelfed. I tried calling Mr. Tony Lentino at +358 942597854, but I got call forwarded to somewhere in Europe over the crappiest VoIP-line there is. I really couldn't understand anything.

DNS is run by Amazon Route 53 at multiple geographical locations. MX-records in e-mail indicate, that their e-mail is handled by Google Mail.

Implementation

This is what their website looked like when I visited it:

It contains couple of pages and some seemingly working actions. I omitted the valid companies from the picture, but the obvious English review of Fortune Motors Oy kind of sticks out. The business is real as all the businesses they're displaying on their front page. This is the business record for that particular company:

Looks like that Finnish company is already out-of-business. And that's what they're using for an endorsement! :-)

Based on the information they're giving out on a HTTP-request:

The cookie they're setting says Laravel framework. Server is running Apache 2.4.7 and PHP 5.5.9 on Ubuntu Trusty (14.04).

Hosting

The IP-address of 52.5.91.166 is registered to Amazon, Inc. Actually the entire CIDR 52.0.0.0/11 is Amazon Web Services' property. There is an Amazon US East data center at Virginia, USA, where the geo IP location of that address points to. So it would be safe to guess, that the web server runs on AWS US East.

Invoice, back

This are their terms and conditions:

That's mostly legal mumbo-jumbo. The text is valid and appears to be legit. The terms are really bad for you, though.

Conclusions

All this says, this is an international operation. All the data is spread over foreign locations to make any investigation really hard without US Department of Justice involved.

What they're doing is not directly illegal or banned, but the way they're doing their "marketing" is dubious at best. They even are running a website, it has business information and "reviews" of those businesses in it. However, some of the businesses are already shut down, and the reviews are very fake. But again, in a court of law, they'll claim, that they're running a marketing business.

In the terms and conditions part, they make it clear, that their "contract" is valid for companies only, that way consumer protection laws don't apply to them. What's between two businesses has very little protection in the legislation. A company can agree to a contract if they wish to do so.

I don't think this will be the last of them.
Beware!

Apple ID Scam: Part 3 - Your Apple ID is on Hold

$
0
0

One of my honey traps got one interesting one. Typiacally the junk is 419 scams, and with all the variations, twists and quirks, they offer very little worth reporting. I have written posts about Apple ID scams earlier, part 1 and part 2.

This is how the "roper" is trying to lure me in. He chose to impersonate the CEO of Apple Inc, Mr. Cook. Really believable, IMHO. :-)

Here goes:

Dear Customer,

We have detected an unauthorized sign in on your Apple ID (me@my.mail)

We have temporarily locked your Apple ID for your safety.
While your Apple ID is locked access to Apple software and your iCloud is limited.

In order to unlock your Apple ID Account please click here.


Privacy

Security and privacy are fundamental to the design of all our hardware, software, and services, including iCloud and new services like Apple Pay. And we continue to make improvements. Two-step verification, which we encourage all our customers to use, in addition to protecting your Apple ID account information, now also protects all of the data you store and keep up to date with iCloud.

We believe in telling you up front exactly what's going to happen to your personal information and asking for your permission before you share it with us. And if you change your mind later, we make it easy to stop sharing with us. Every Apple product is designed around those principles. When we do ask to use your data, it's to provide you with a better user experience.


Our commitment to protecting your privacy comes from a deep respect for our customers. We know that your trust doesn't come easy. That's why we have and always will work as hard as we can to earn and keep it.

Tim Cook
CEO, Apple Inc.

Sure, it could have been true. It could be possible, that my Apple ID was put into hold because somebody attempted to hack it, but it wasn't.

Findings:

  • The Apple logo in the HTML-version of the e-mail was loading from http://i.imgur.com/zGVkgD1.png. I don't think Apple corporation would do that.
  • The link to unlock pointed into http://support.apple.com.en-gb.confirm.id.auth.cgi-key.myapple-unlock.web.user.<THIS-PART-REMOVED>.com, which really doesn't sound something that Apple would use.
    • Actually, at the time of writing, entire domain was removed. It's not available, no DNS, no nothing.
  • The domain was registered via Todaynic.com, Inc. That is a Chinese domain-company. Really! I'm sure Apple wouldn't use them.
  • Registrant for the domain was a private person, allegedly living in Beijing, China.
  • The e-mail has following route:
    1. Original client at Suddenlink Communications DHCP-pool. IP has location of Greenwood, Mississippi, USA
    2. Mail relay via Power DNN of Omaha, Nebraska, USA
    3. Google Mail
    4. Me
  • Mail route doesn't make any sense. All my real Apple e-mail originates from Apple directly, not via obscure teleoperators.

I think that's plenty of proof to call that one a fake! :-)

OS X El Capitan upgrade - Afterwork with Verisign certificates

$
0
0

I previously wrote about upgrading OS X El Capitan. After doing couple of boxes I ran into a SNAFU.

If you don't see anything in that page, that's correct! There is nothing there. It would be a safe assumption, that something had gone wrong. :-(

Here is what web browser console says:

Error was: "Failed to load resource: The certificate for this server is invalid." As the errors were emitting from Amazon CloudFront, it didn't make any sense at all. Either Amazon had some sort of security fault happening, or I did. Unfortunately in such situations, the odds are always against me. I had upgraded couple of Macs already and had no problems with them, this box must have had something wrong with it.

My next move was to get a list of trusted root certificates shipping with an OS X. The list is available in Apple knowledgebase article HT205204. Here is what I got:

Another error: 'Safari can't verify the identity of the website "support.apple.com"'. Right. First Amazon was failing on me, then Apple. At this point I whipped up an already upgraded Mac and went for the page, this time it looked ok:

That was the proof, that something was badly off on that Mac.

For fact gathering I went trough the certificate chain of support.apple.com:

As the certificate wasn't trusted, the page looked horrible and there was no lock-icon on the address bar. The important fact here was, that the root certificate of VeriSign Class 3 Public Primary Certification Authority - G5 had version number 3 and serial number of 25 0C E8 E0 30 61 2E 9F 2B 89 F7 05 4D 7C F8 FD. On the working Mac same certificate:

A completely different serial number of 18 DA D1 98 26 7D E8 BB 4A 21 58 CD CC 6B 2B 4A.

Then the relevant question was: Why do they differ? The facts are at OS X certificate store. It so happens, that all certificates can be viewed and altered via Keychain Access -tool. I went to see the System Roots -keychain:

But that didn't solve my problem! VeriSign Class 3 Public Primary Certification Authority - G5 was there and had the proven correct serial number of 18 DA D1 98 26 7D E8 BB 4A 21 58 CD CC 6B 2B 4A. More poking around, and this is what I found:

A set of Verisign certificates on login-keychain. Weird. One of them was:

There was the 25 0C E8 E0 30 61 2E 9F 2B 89 F7 05 4D 7C F8 FD! The only appropriate action was:
And that solved it! Simply letting the weird ones go made all my websites work again.

But where did those certs come from? By googling I found Why is Symantec/Verisign CA appearing as an invalid authority? [closed] and Invalid certificate after Security Update 2015-004 in Mavericks. They both were pointing a finger to April 2015 security update. The release notes About the security content of OS X Yosemite v10.10.3 and Security Update 2015-004 say:

Certificate Trust Policy
Impact: Update to the certificate trust policy
Description: The certificate trust policy was updated. View the complete list of certificates.

I just happened to update the Mac too early and got a flawed upgrade. It is also possible, that on April, when I got bad certs, I may have gone to Verisign and manually loaded the proper root certificates in to fix my problem at the time. However, it just blew up on my face on OS X 11 upg.

If you never encountered any of this: good. I honestly don't think this issue is touching a wide audience. However, I disclosed this information for archive purposes. If something like this happens in the future, you have a clue what to look for.

GNU Parted: Solving the dreaded "The resulting partition is not properly aligned for best performance"

$
0
0

On the other day I was cleaning out junk from my shelfs and found a perfectly good WD Caviar Black hard drive. Obviously in the current SSD-era where your only computer is a laptop and most of your data is stashed into a cloud somewhere, no regular Joe User is using spinning platters.

Hey! I'm not a regular, nor joe. I have a Linux-server running with plenty of capacity in it for my various computing needs. So, the natrural thing to do is to pop out one of the old drives and hook this 1,5 TiB high performing storage monster to replace it. The actual hardware installation on an ATX-case isn't anything worth documenting, but what happens afterwards goes pretty much this sequence: 1) partition the drive, 2) copy all/some of the old data back to it and 3) continue living successfully ever after.

The typical scenario is that something always at least hiccups, if not fails. And as expected, I choked on the 1).

Here goes:

Preparation

The drive had been used previously, and I just wasted the beginning of the drive by writing 10k sectors of nothingness. This will remove all traces of possible partition tables, boot sectors and all the critical metadata of the drive you normally value highly:

# dd if=/dev/zero of=/dev/sda bs=512 count=10000

Pay attetion to the details. It would be advisable to target a correct drive. In my case a regular JBOD-drive really appears as /dev/sda on the Linux-side. On your case, I'm pretty sure your operating system runs on /dev/sda, so please don't wipe that.

Then with GNU Parted, create a GUID partition table (or GPT):

# parted /dev/sda
GNU Parted 3.1
Using /dev/sda
Welcome to GNU Parted! Type 'help' to view a list of commands.
(parted) mktable gpt

That's it for the preparation part.

Attempt 1: The stupid way

Regardless what's on the drive already (in my case, its compoletely empty), Parted syntax allows an approach, where you create a partition using the maximul allowed capacity from start 0, to end -1. Like this:

(parted) mkpart LVM ext4 0 -1
Warning: The resulting partition is not properly aligned for best performance.
Ignore/Cancel? c

That obviously will emit an error about non-optimal partition alignment. But hey, that's what I asked for. I obviously cancelled that attempt.

Attempt 2: The smart way

A smart approach would be to see about the boundaries:

(parted) print free
Model: ATA WDC WD1502FAEX-0 (scsi)
Disk /dev/sda: 1500GB
Sector size (logical/physical): 512B/512B
Partition Table: gpt Disk Flags:

Number Start  End    Size   File system Name Flags

       17.4kB 1500GB 1500GB Free Space

Now we have a range of 17.4 KiB to 1500 GiB which can be used for a new partition. Let's try that:

(parted) mkpart LVM ext4
Start? 17.4kB
End? 1500GB
Warning: You requested a partition from 16.9kB to 1500GB (sectors 33..2929687500).
The closest location we can manage is 17.4kB to 1500GB (sectors 34..2930277134).
Is this still acceptable to you? Yes/No? y
Warning: The resulting partition is not properly aligned for best performance.
Ignore/Cancel? c

I have bumped into this number of times earlier. Why in the f**k cannot the Parted tell me what values it wants to see there!! Come on! :-(

This is the part where it hits me like a hammer: enough bullshit, let's solve this once and for all!

Attempt 3: Solution

This is the script I wrote: parted_mkpart_calc.sh.

It is based on the information found from following sources:

It is a Bash-script to do the math for you. Example usage:

$ ./parted_mkpart_calc.sh sda
Using default 1 MiB default alignment in calc
Calculated alignment for /dev/sda (gpt) is: 2048s

If you would be root, you could create partition with:
# parted /dev/sda mkpart [name] [type] 2048s 2930276351s
Verify partition alignment with:
# parted /dev/sda align-check optimal 1 Should return: 1 aligned

I just enter one argument to the script: sda. From that, the script deduces the alignment, that should be used when partitioning that block-device. In this case it is 2048 sector boundaries (what it doesn't say is, that a sector contains 512 bytes). But it outputs 2 commands which can be copy/pasted (as root):

parted /dev/sda mkpart [name] [type] 2048s 2930276351s

If you would replace [name] with a partition name and [type] with a partition type, it would create a correctly aligned partition to fill up most of the drive. It won't fill up exactly all of the drive, because of the alignment issues.

To help that issue, I added a feature to do the following:

$ ./parted_mkpart_calc.sh sda LVM ext4

Optionally, you can provide the partition name and type on the command line to get:

parted /dev/sda mkpart LVM ext4 2048s 2930276351s

as output. That's ready-to-go copy/paste material.

Finally, you can verify the correct alignment:

# parted /dev/sda align-check optimal 1
1 aligned

That's the proof, that calc worked ok.

Attempt 4: The simple way

It didn't take long, before I got my first comment on this article. It was simply: "Why didn't you use percentages?". What? What percentages.

Example:

(parted) unit s
(parted) print
Model: ATA WDC WD1502FAEX-0 (scsi)
Disk /dev/sda: 2930277168s
Sector size (logical/physical): 512B/512B
Partition Table: gpt
Disk Flags:

Number Start End         Size        File system Name Flags
 1     2048s 2930276351s 2930274305s             LVM
(parted) rm 1
(parted) mkpart LVM ext4 0% 100%
(parted) print
Model: ATA WDC WD1502FAEX-0 (scsi)
Disk /dev/sda: 2930277168s
Sector size (logical/physical): 512B/512B
Partition Table: gpt
Number Start End         Size        File system Name Flags

 1     2048s 2930276351s 2930274305s             LVM

Using range 0% 100% will produce exactly the same results. :-) Amazing!

So, parted knows the alignment and can use it, but not if you don't first do a rain dance and knock three times on a surface sprinkled with holy water.

Final Words

Why does Parted complain about mis-alignment, but offers no help at all? That's just plain stupid!

Of course, I should add the feature to the source code and offer the patch to FSF, but on the other hand. Naah. I don't want to waste any more energy on this madness.


Replacing physical drive for LVM - pvcreate Can't open /dev exclusively

$
0
0

This is part 2 of my hard drive upgrade. My previous part was about failure to partition a replaced hard drive with GNU Parted: It was just emitting an error of: "The resulting partition is not properly aligned for best performance"

When I had the drive partitioned properly, I failed to proceed with my setup in a yet another mysterious error. My drives are always using LVM, so that I get more control over the filesystem sizes. To get the new partition into LVM, it needs to be associated with a Volume Group (VG). First step is to inform LVM about new physical drive:

# pvcreate /dev/sda1
  Can't open /dev/sda1 exclusively.  Mounted filesystem?

Oh really? It's definitely not mounted, but ... somebody is stealing my resource. The root of this problem is obviously on the fact, that there used to be a PV on that partition, but I replaced the drive and partitioned it. It is entirely possible, that LVM likes to fiddle with my new partition somehow.

The device mapper knows about the partition:

# dmsetup ls
Box_vg1-LogVol_wrk2   (253:9)

That's kind of bad. I guess it likes to hold on into it. Further check of:

# pvdisplay

... indicates, that LVM doesn't know about the partition (yet), but Linux kernel does.

An attempt to fix:

# dmsetup remove Box_vg1-LogVol_wrk2

And new attempt:

pvcreate /dev/sda1
  Can't open /dev/sda1 exclusively.  Mounted filesystem?

No change. :-( Perhaps a strace will provide helpful details of the problem:

# strace pvcreate /dev/sda1
...
stat("/dev/sda1", {st_mode=S_IFBLK|0660, st_rdev=makedev(8, 1), ...}) = 0
open("/dev/sda1", O_RDWR|O_EXCL|O_DIRECT|O_NOATIME) = -1 EBUSY (Device or resource busy)
...

Reading a fragment of OPEN(2) man page:

OPEN(2)
open, openat, creat - open and possibly create a file

       O_EXCL Ensure that this call creates the file: if this flag is
              specified in conjunction with O_CREAT, and pathname already
              exists, then open() will fail.

              In general, the behavior of O_EXCL is undefined if it is used
              without O_CREAT.  There is one exception: on Linux 2.6 and
              later, O_EXCL can be used without O_CREAT if pathname refers
              to a block device.  If the block device is in use by the
              system (e.g., mounted), open() fails with the error EBUSY.

... confirms the suspicion, that somebody is holding a handle to the block device. Running lsof(8) or fuser(1) yield nothing. It's not a file-handle, when kernel has your block device as hostage.

My only idea at this point was to do a wimpy Windows-style reboot. The thing is: Linux-men don't reboot on anything, but this time I was out of ideas. I'm sure somewhere there is an IOCTL-call to release the handle, but I couldn't find it easily. So, a reboot was in order.

After the reboot: yes results:

# pvcreate /dev/sda1
  Physical volume "/dev/sda1" successfully created

Then I could proceed with my build sequence. Next, associate a Volume Group with the new Pysical Volume. The options would be to to add the drive into an existing VG, or create a new one. I chose the latter:

# vgcreate Box_vg1 /dev/sda1
  Volume group "Box_vg1" successfully created

Then create a logical partition, or Logical Volume in LVM-lingo on the newly created VG:

# lvcreate -L 800G -n LogVol_wrk2 Box_vg1
  Logical volume "LogVol_wrk2" created

As a physical partition also a LV needs to have a filesystem on it, to be usable for the operating system:

# mkfs.ext4 /dev/Box_vg1/LogVol_wrk2
mke2fs 1.42.12 (29-Aug-2014)
Creating filesystem with 209715200 4k blocks and 52428800 inodes
Filesystem UUID: 93be6c97-3ade-4a62-9403-789f64ef73d0
Superblock backups stored on blocks:
        32768, 98304, 163840, 229376, 294912, 819200, 884736, 1605632, 2654208,
        4096000, 7962624, 11239424, 20480000, 23887872, 71663616, 78675968,
        102400000

Allocating group tables: done
Writing inode tables: done
Creating journal (32768 blocks): done
Writing superblocks and filesystem accounting information: done

Now the drive was ready to be mounted and I had plenty of completely empty space waiting for data to be stored on it.

I plugged in a SATA-USB -dock and started looking for my old data. I intentionally had created a VG with precisely the same name as the old drive had, so there was an obvious collision. My syslog had entries about the pvscan:

Nov  8 16:03:21 pvscan: device-mapper: create ioctl on Box_vg1-LogVol_wrk2 failed: Device or resource busy
Nov  8 16:03:21 pvscan: 0 logical volume(s) in volume group "Box_vg1" now active
Nov  8 16:03:21 pvscan: Box_vg1: autoactivation failed.

Yes, that one I had coming. No autoactivation, as VG names collided. A check:

# vgdisplay
  --- Volume group ---
  VG Name               Box_vg0
...
  --- Volume group ---
  VG Name               Box_vg1
...
  --- Volume group ---
  VG Name               Box_vg1
...
  VG UUID               trx8sq-2Mtf-2tfa-2m1P-YPGq-cVzA-6fWflU

No surprises there, there were two Volume Groups with exactly same name. To address them, there are unique identifiers or UUIDs. With UUID, it is possible to rename the VG. Like this:

# vgrename trx8sq-2Mtf-2tfa-2m1P-YPGq-cVzA-6fWflU Box_vgold
  Volume group "Box_vg1" successfully renamed to "Box_vgold"

Now it would be possible to activate and it would appear on udev:

# vgchange -ay Box_vgold
  1 logical volume(s) in volume group "Box_vgold" now active

Now the old data was available at /dev/Box_vgold/LogVol_wrk2 and ready to be mounted and files copied out of it.

Done and mission accomplished! Now I had much more space on a fast drive.

Viewing all 516 articles
Browse latest View live